Bike Building
So 2 and a bit years late but I’ve just found the memory card with all my photos on from the fantastic bike frame building I did at https://www.bicycles-by-design.co.uk in Ironbridge in the late summer of 2016. I have no hesitation in recommending going to Rob and Pete if you fancy something similar. Sure it will cost you about the same as having a custom frame built by top makers like these guys but its way more satisfying to start with a pile of steel pipes and fittings and a week later have a bike frame created by your own hands (with a load of help and advice) than send off a cheque and wait a few weeks for a bike box arriving on your doorstep.
So to day one, well actually the it all started well before day one with figuring out exactly what it was I wanted to build and choosing things like the steel to use, in my case oversize Reynolds 725 for the frame and 631 for the forks, and all the lugs, frame ends and fittings. The first morning is all about customising the fit and designing the frame so off upstairs with Rob to the fitting studio to create the mm perfect sizing, lots of tweaks and adjustments, and pointing out my shoulders are lopsided when on a bike (along with advice on what to do if it becomes a problem) we had a bunch of number to put into Bikecad to come up with the design. In my case a 26″ wheel, disk brake, Rohloff ready but equally capable of running regular gears, go anywhere expedition touring bike along the lines of say a Co-Motion Pangea or Dawes Gran Tour. Once that was done the nerve wracking and exciting bit could begin. Last time I did any brazing or metalwork was at school in the late 1970s and early 1980s.
")
")
")
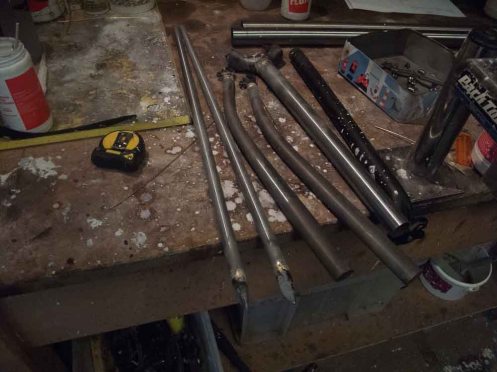
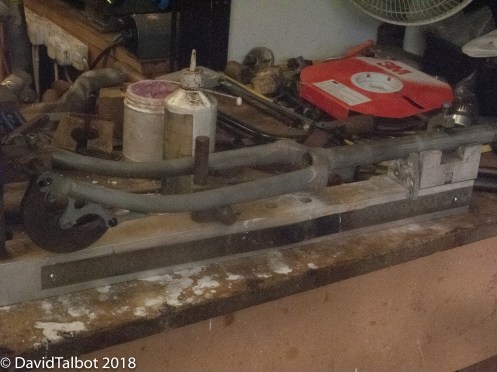
This is what you could call a bike kit, lugs, frame tubes and assorted bits and bobs including the sliding dropouts and plates to set the bike up with regular gears to start with.
Then after a safety briefing time to start building and pretty much straight away onto brazing things together.
And here is pretty much the full bike set (chain stays missing as the rather wide spacing needed for the sliding dropouts needed a none standard curved pair) with the first simple brazes done, dropouts into the fork blades, fork crown onto steerer and top eyes onto seat stays, but a load of work is needed to get to this stage. First lesson to learn about brazing is everything must be clean so off to the sand blasting cabinet to get rid of any corrosion, but not too much sand blasting as that 725 tubing is less than 1mm thick and according to Pete perfectly possible to sandblast through, which would be an expensive mistake to say the least! Once everything was clean it was time for the brazing, first lots of flux on everything then apply the heat, aiming for a nice cherry red glow to indicate the right temperature and feed in the brass and make it flow through the join bonding the metal. Far easier to write than to do the first few times but with expert coaching and some gentle guiding of my torch hand by Pete buy the end of day one the first few brazes had been made
")
")
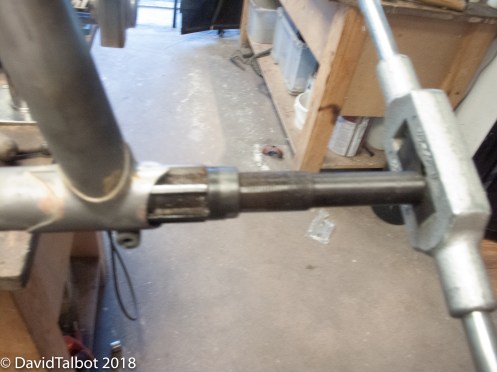
A couple of shot of the fork crown attached to steerer showing how the brass had drawn though the whole joint making a strong bond.
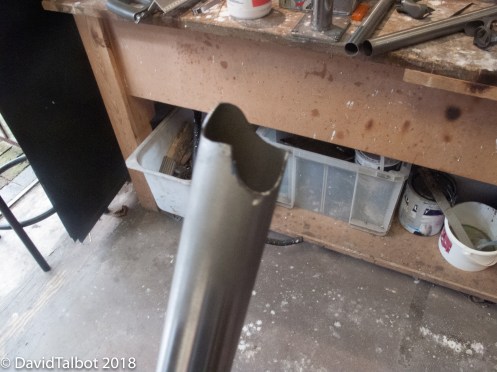
Day two was time for the scary stuff, cutting and filing those Reynolds pipes!
")
")
")
")
")
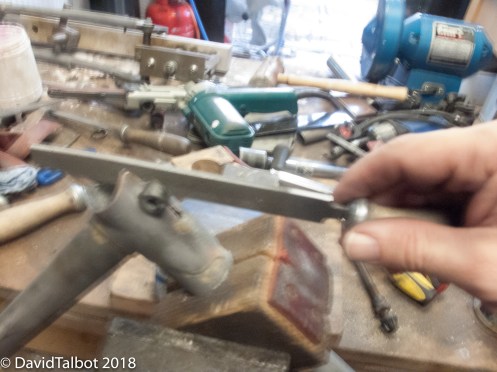
Getting the perfect fit between the tubes, even though it will be hidden in a lug and never seen again is important to create the strongest possible bond when everything is brazed together. Again in the last 3 shots above we can see how (with a load of expert help) the brass has been drawn right though the joint.
Mitring the tubes where the cross bar and down tube meet the head tube and down tube goes into the bottom bracket occupied a good few hours, this one on the down tube into the bottom bracket was the most complicated.
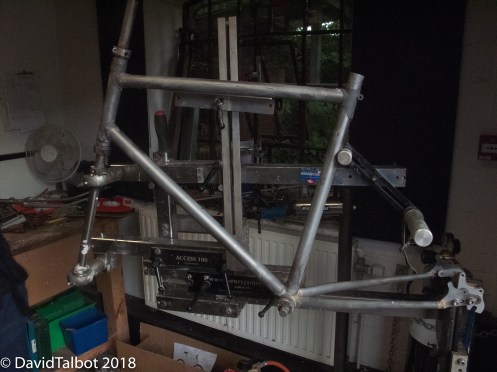
Then it was time for a bit of setup on the frame building jig (all carefully adjusted to reflect the measurements and angles from Bikecad).
")
")
")
Day 3 was the busy day of brazing finishing up with a pretty much bike shaped frame but first time to start the rear triangle and braze up the forks
")
")
")
And then onto the big braze! Everything except the seat stays now carefully mitred and set up in jig ready to braze
Coat everything in lots of flux, fire up the torch and away we go, with Pete skilfully manoeuvring the jig and making sure the brass was flowing though the joints an hour or so later it looks like this.
Some work to do on the forks to fit the disk brake mounts in exactly the right spot
Outside next as it was a nice September day to clean up all that surplus flux and blobs of brass.
 And back to the workbench for some detail work shaping the top of the .
")
")
Day 4 was onto the real detailed work, finishing off the rear triangle, adding the brake and chain stay bridges. Also all the cable guides and bottle bosses and Some very detailed silver soldering involved here where Pete took over to make sure this exacting bit of the build was done right. But to start it was reaming out the seat tube
And cutting the slot to create the seat clamp
 Then time to complete the basic frame with the seat stays and bridges to finish the rear triangle.
")
")
")
")
")
And finally all the tiny details like bottle bosses (3 sets on this bike as befits a full on touring bike) and cable guides.
")
")
Day 5 and a nice sunny day to go outside and get on fettling, getting rid of all the excess brass my inexpert brazing had added and cleaning up all the burnt on flux to get the frame ready for painting.
")
")
")
")
")
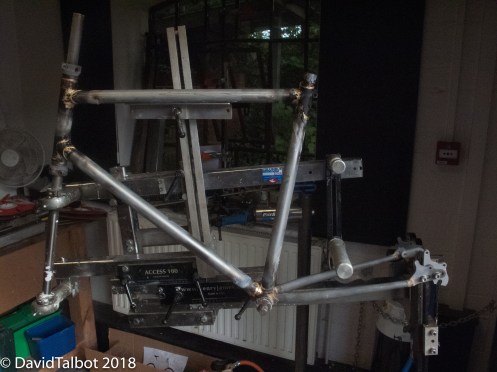
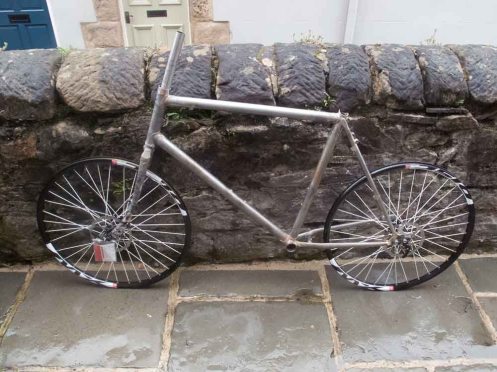
So a fabulous week of instruction from two of the best frame builders in the business and you leave with something like this (though of course your own special version of this!). Still a little more fettling to do to get it ready for painting
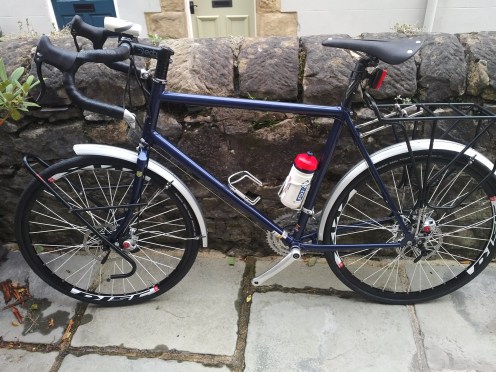
 And after painting it looks even better, particularly after Bicycles By design have added the head badge I designed which is far shinier than this poorly lit photo shows!


And what this was all about, my custom fitted expedition tourer, loosely based on those commercial bikes I mentioned at the start but with the decades of knowhow of Pete and Rob built in to make it better!